Jira #
shipit’s Jira integration allows for linking roadmap items to Epics in Jira. With the itegration active, Epics are created automatically.
Furthermore, the Jira integration can also be used to populate your initial roadmap from your existing Jira Epics.
The Jira integration works on both Jira Cloud and Jira Server.
Roadmap items and Epics #
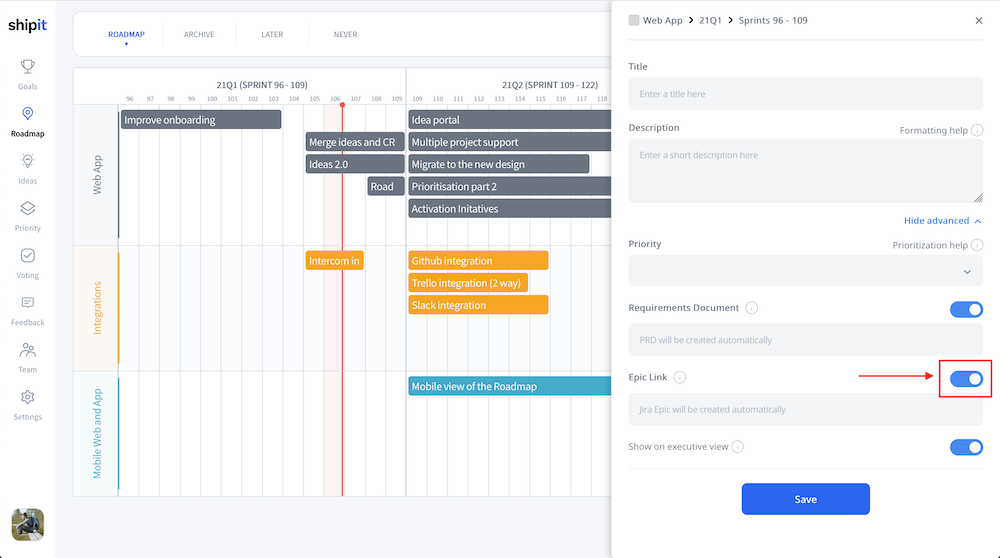
Product roadmap items in shipit can be linked to Epics in Jira. When the Jira integration is turned on, the Epic an be created in Jira automatically:
- The title of the Epic is the title of the roadmap item
- The description of the roadmap item is copied to the description of the Jira Epic
When creating an item, make sure the flag “Create” is turned on, and an Epic will be created automatically for the roadmap item.
Populating the roadmap from Jira Epics at setup #
You have the option to import existing Jira Epics as items onto the shipit roadmap. This can be done at the time of connecting Jira (see next section). In the process you can specify into which roadmap track and quarter to import the items (the also can be added to the “Later” section), and then move them to the right place later.
Jira integration configuration #
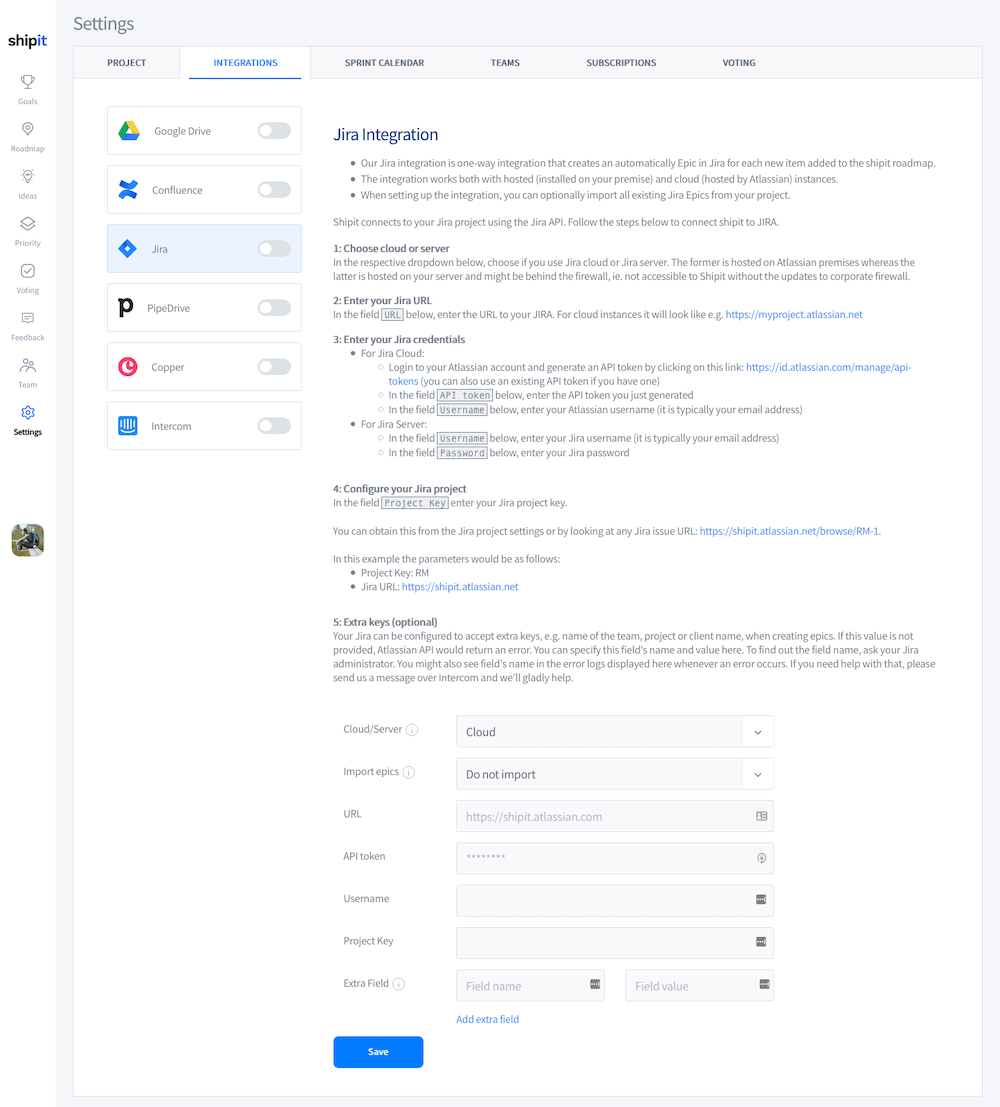
First choose Cloud ot Server, depending on which type of Jira you are using. Then follow the instructions:
- Login to your Atlassian account and generate an API token: https://id.atlassian.com/manage/api-tokens. If you have Jira Server (hosted version), you don’t need to do that. Instead, use a user’s password.
- Enter your Jira URL (e.g. https://shipit.atlassian.net), username (your Atlassian username - often your email address), API token (from the previous step), Jira project key
- You can take the Jira URL, and the project key from the url. For example, your regular issue URL would look like: https://shipit.atlassian.net/browse/RM-1
In this example the parameters would be as follows: Jira URL: https://shipit.atlassian.net Project Key: RM
Most common problems #
Jira is highly configurable software. At Shipit we have built our integration with the most common settings in mind, however sometimes you might experience issues when setting up new configuration. Here are the most common.
Field ‘customfield_10011’ cannot be set #
The full error message is something along the lines “Field ‘customfield_10011’ cannot be set. It is not on the appropriate screen, or unknown.”. The “customfield_10011” number can be anything.
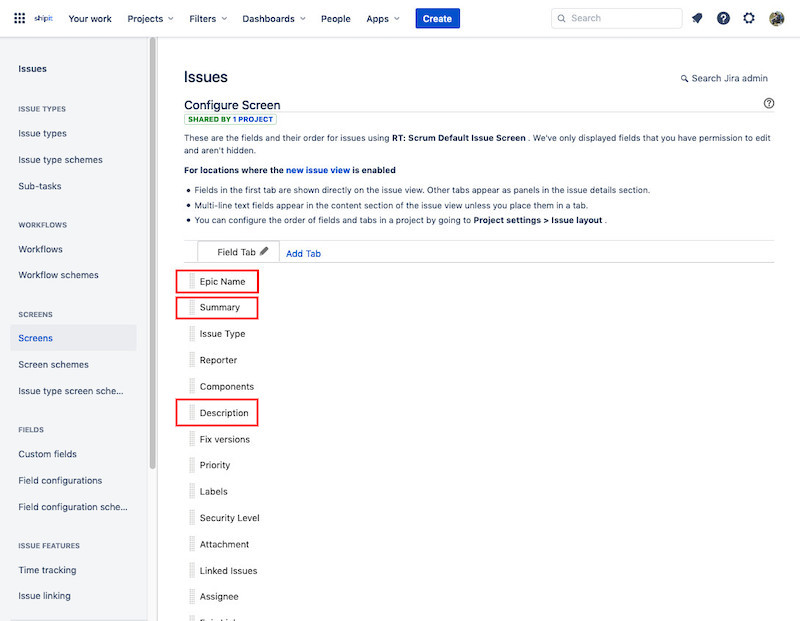
When you have Jira integration enabled, we create epic for every new item you add on the roadmap. Fields that are populated are the following: epic name, description, and summary. These fields must be available in the issue edit screen, i.e. when you manually add new issue in Jira, you must be able to fill in these fields. In order to ensure they are present, do the following:
- As a Jira administrator, go to your project settings:

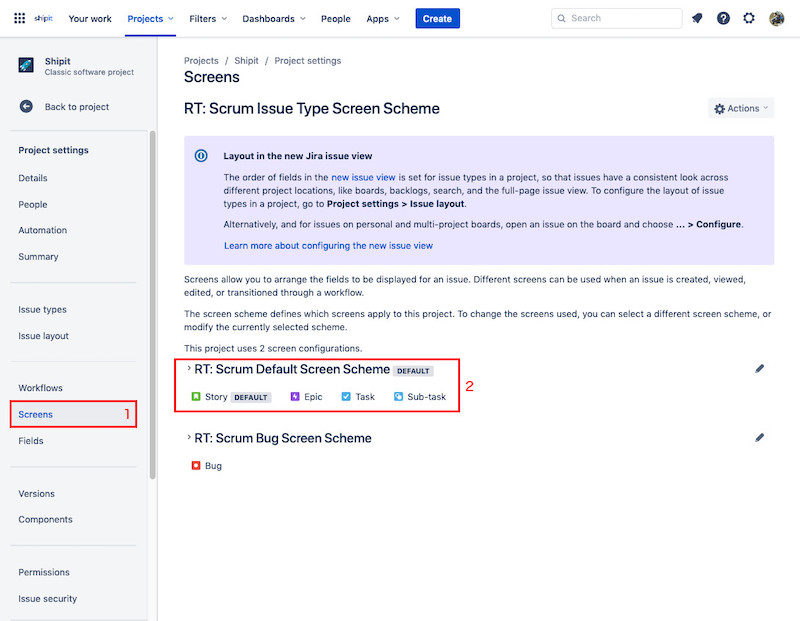
- Navigate to the “Screens” settings in the sidebar menu, and find the screen scheme that contains “Epic” issue (usually it’s the default scheme):
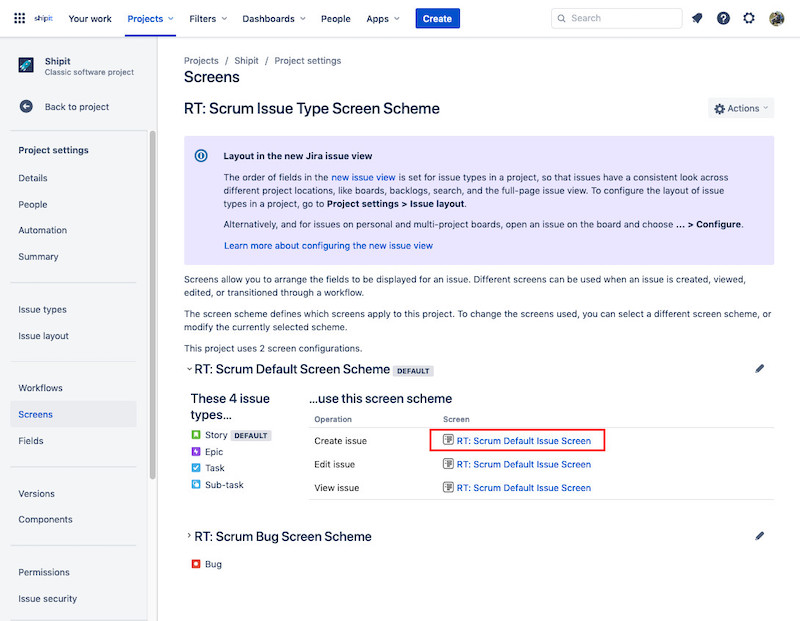
- Next to the “Create” operation click the link to configure the screen:
- Finally, in the search field look for “Epic name”, “Summary”, and “Description” fields, and add them to the list:
Cannot create hosted Jira integration #
When setting up an integration with your hosted Jira version, you might get a connection or timeout error. If you can access Jira from your browser, most likely the reason is that you are behind a corporate VPN, on internal corporate network, or your IP has been whitelisted in the firewall or Jira settings. Since Shipit is hosted outside your safe corporate network, it cannot access Jira.
In case this happens to you, contact us on Intercom and we will give you a list of IP addresses to pass to your IT team so they can whitelist our servers.